-----In 2004 we bought a falling-down house and 30 acres. This blog documents our progress-----

Showing posts with label garden. Show all posts

Saturday, January 05, 2013

The water lily experiment

Years ago I attempted to grow water lilies in the dam.  It was a complete failure to the point that I had pretty much decided to give up on it.  But Dad had other ideas.

His first attempt was to plant them in giant barrels in the lake:

waterlily attempts - 1

From Dad's description:
I have filled 3 of my large blue barrels with fresh water in place in the dam in front of the veranda to experiment with whether water lilies work this way.... When you come and if you wish to have a deck made over these pots, which stick up above the high water line by 8 inch or so, we will discuss the configuration... I will progressively lower the plant pot to the bottom of the barrel as instructed...  Once it is settled in the water it should generate more and more leaves, and ultimately flowers. They are setup in pots by the garden shop so I didn't need to do anything but suspend the pot from the top until the leaves were floating. But they must be in deep water to flower. I will also put fresh water to them when you have decided the configuration of the pots and shape of the surround decking

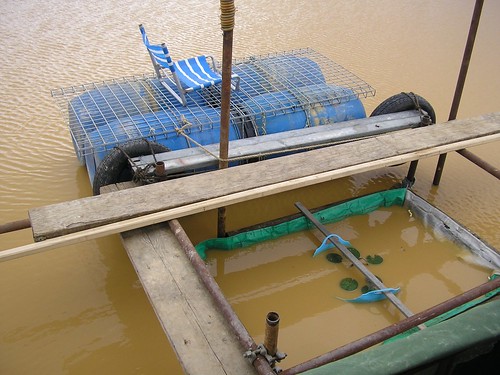
But this turned out not to work.  In the time between Dad's visits it was so hot that the water in the barrels evaporated, so it was unsustainable without someone there to top it up.  Not to mention the problem of the water stagnating.  So then Dad came up with an alternative plan -- suspending them in the dam directly inside an old bag he'd had for filling concrete, which let water in at the seams, to protect from yabbies.  I can imagine this looking a lot better than the barrels, so long as the bag goes down with the water level and we get some less obtrusive planters.  Note too the bonus of the little pontoon Dad built with the no longer needed old barrels!  I reckon if we got this covered with some decking it could be surprisingly cute.  :)
waterlily attempts - 4


Saturday, September 01, 2012

A fence from Parnu, Estonia

In mid-August I went on a week's road trip across Lithuania, Latvia and Estonia.  It was great, although I wish we'd had more time, since there were some great things that were off the beaten path that we weren't able to see.

However, one night we stopped in Parnu, a beach resort town in Estonia, about halfway between Riga and Tallinn.  While wandering there I saw this fence:

Estonia - Parnu - 27

While it's not the lovely brick walled garden fence of my dreams, it doesn't look half bad.  And it would be a hell of a lot cheaper and faster to erect than brick.  So perhaps we could compromise... put fence like this between most of the pillars, with solid brick walls in just a few sections.  That way we'd still have area to grow fruit against the walls, but without it completely breaking the bank, which a fully enclosed bricked walled garden will sadly do.  

Friday, August 26, 2011

The Great Pillars of Amherst

Pete had a chance to do some more work on the brick columns for the garden.  Or as Michael (who helps with the mowing) christened them, "the great pillars".  I agree, they do look a little ridiculous out on their own in the middle of a field, but just you wait till they're joined up :-)
brick pillars for walled garden - 4 CROPPED

Sunday, June 12, 2011

Mowing update

I can't get over how fast this year is going.  It seems like only a few weeks ago that we had the mowing done but it was actually 4 months!

Michael kindly sent some photos so we could see the finished job.  The orchard looks same as last time except that the trees are in their winter / no leaves coat.

orchard after mowing - 2 orchard after mowing - 1

This time he also mowed up in the olive grove, and that's looking a little more exciting - the olives are looking like proper bushes now, giving me hope they might one day appear tree-like.  His main focus was clearing around the fenceline I think, which Dave had run out of time to do last trip.

olive grove after mowing - 6 olive grove after mowing - 5

Next trip I want to get some more plants in around here to take advantage of it being fenced...  I was thinking of Agaves, but not sure they will be practical around the olives, so perhaps will need to look for some other succulents that are hardy enough to grow with zero support.  Hmmm.  


Sunday, April 24, 2011

The olives are thriving

Dave spent the last day at Amherst clearing his beloved olive grove. He moved away all the bits of wire and mowed it, and it looks amazing.

olive grove - 9

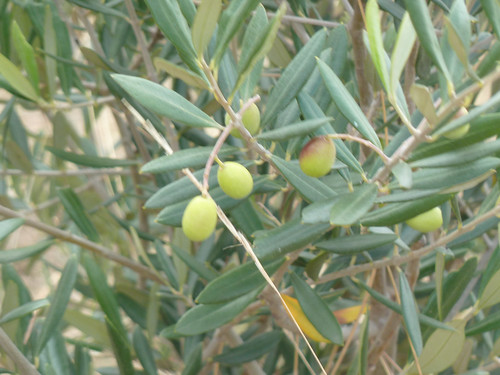
Some of the trees are nearly as tall as Dave. Even better, some have actual olives on them!

olive grove - 4

olive grove - 2

Behind the olives, there are a couple of peppercorn trees that Dave planted on his last visit. They're doing really well too, they'd nearly doubled in size. They're meant to be pretty fast growing so with like by the time we move there they'll look like actual trees.

olive grove - 7

Step 4: building the columns

Once the foundations were sorted, the most exciting part (for me anyway) began - building the columns.

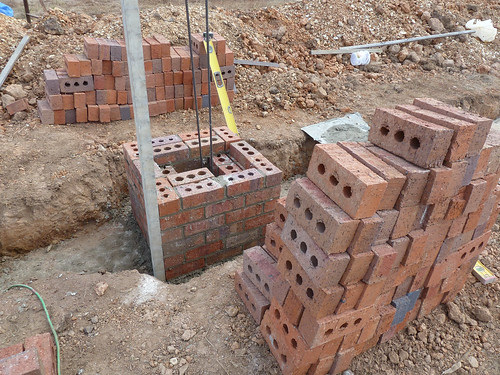
The brick delivery guy kindly used his forklift to scatter the pallets around the paddock, so they'd be near where Pete would need them.


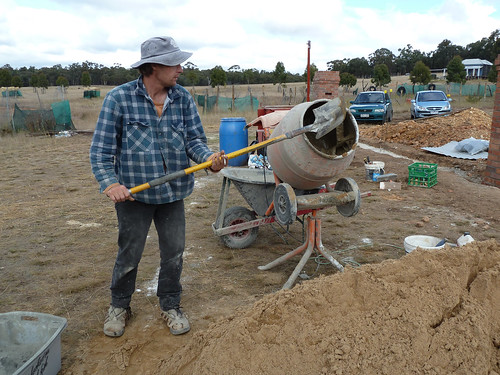
Then Pete began work. First he used the mixer to make mortar by mixing cement, sand and water.

working on the garden wall - 11

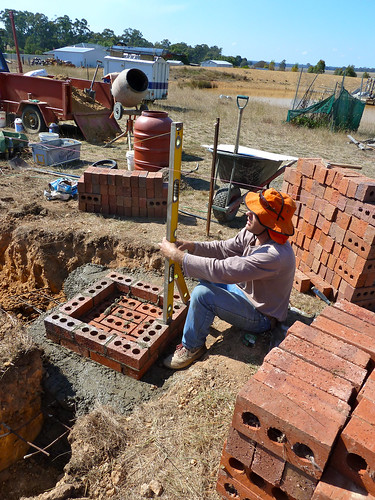
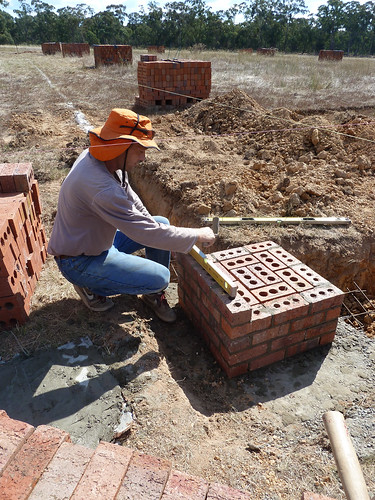
Then he started laying, using the Daniel Robertson bricks on the outside and the cheaper (less nice looking) bricks on the middle. Each row needed leveling, then more mortar and repeat.

building the columns - 02 building the columns - 04

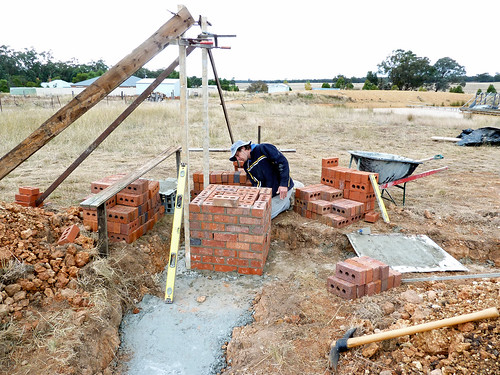
After a few rows - apparently called 'courses' - he built a frame to serve as a guide to the level. Then he just continued straight on up.

building the columns - 11

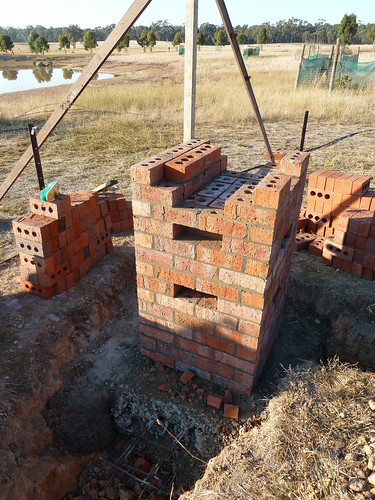
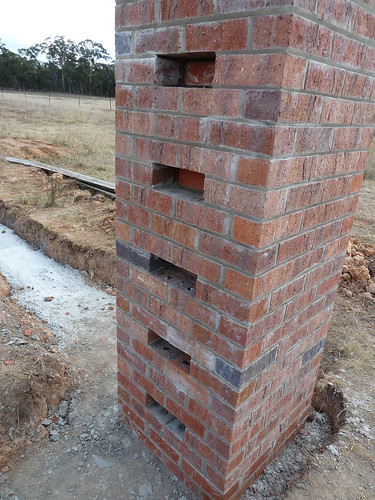
To make it easier to join up the middle bits, he left holes on the side parts. And at the top he did a nice pattern which is modeled on the shape of our chimney in London. For the time being, the top is filled in with cement, but left flat so ultimately we can perhaps put a planter or something on top.

building the columns - 07 building the columns - 09

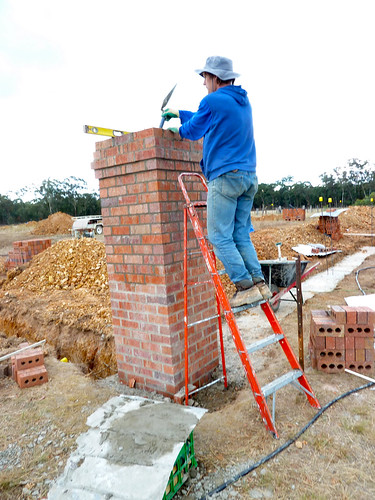
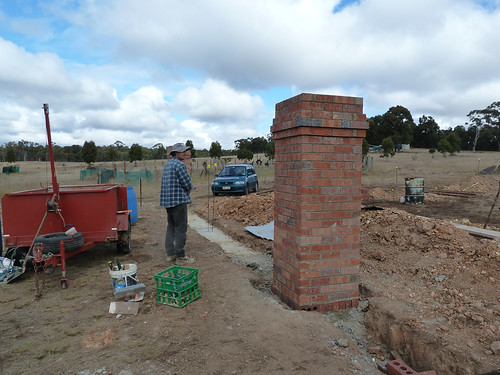
In the end Peter managed to get 4 columns built in the time they had. Each column is around 2.1-2.2m tall (Dave can't remember exactly). But you can get a good sense of the scale in this pic with Pete atop. :-)

building the columns - 16

Originally I had planned on having columns every 3-4m, but on site Dave revised that to every 5m. I've been worried about this, right up till today when I finally had the brainwave to go and measure at the walled garden in the park - and found they were even further apart! (more like 5.5-6m). So now I am much relieved. :-)

They decided to do large columns (3 x 3 bricks) on the corners and for the gateposts at either end, with smaller columns (2 x 2 bricks) in between. This is the rough plan they sketched up:

the latest vegie garden plan

We've got a long way to go obviously, but at least from here on progress will be visible!

Step 3: pouring the concrete

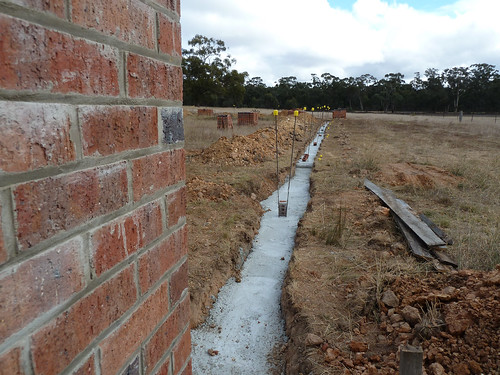
Once the steel was in position, the next step was to fill the trenches in with concrete.

The area was way too vast to attempt to do by hand, so we ended up getting readymixed concrete trucked in from Eureka Concrete. Who clearly are great suppliers, not only because they were friendly and reliable, but because they have trucks that look like Tonka toys :-)


Each truck contained 5 cubic metres worth of concrete, and we needed 7m for the short sides and 10m for the long side. We poured a side a day, so each day we had two trucks turn up.

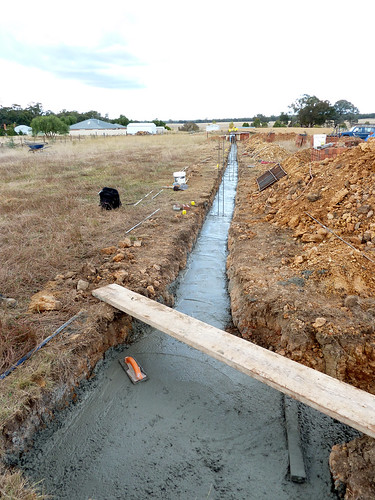
The concrete came out of a big funnel which had a lever so you could direct it. To get it to spread and settle in properly you poked it with a shovel. Then finally to smooth it out you use a little spreader thing, as if you were icing a cake.


concrete in the trenches - 04 concrete in the trenches - 09

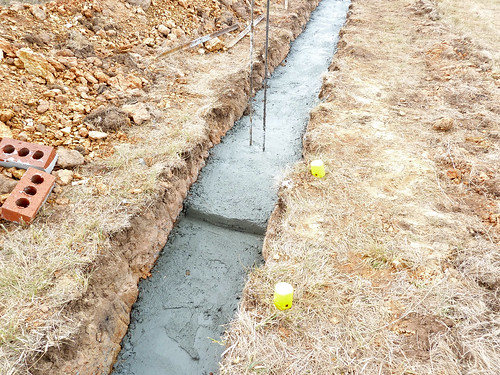
The final complication was that our ground was on a slight slope - but the concrete had to be level in order for the brick columns to be built upon. So every so often the guys had to put in little steps in the concrete - this too had to be worked out in advance.

concrete in the trenches - 06

Overall, it took about 20-30 minutes to pour each side, then another 30 mins to do the smoothing. The concrete was hard enough to walk on within a few hours, but to be safe we didn't start building columns on it until the next day after it had been poured.

Step 2: laying the steel

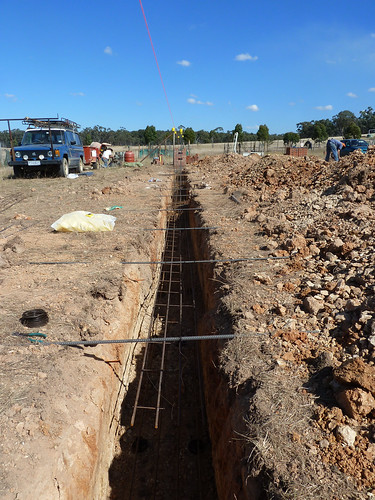
After the trenches were dug, each needed steel to be carefully laid within.

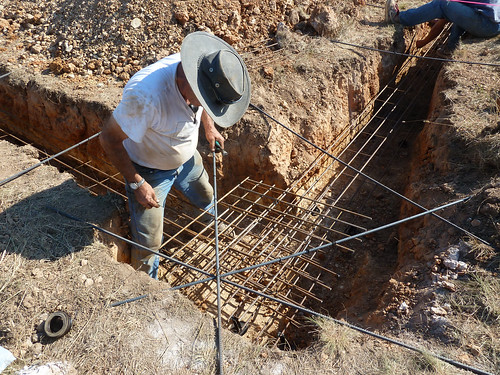
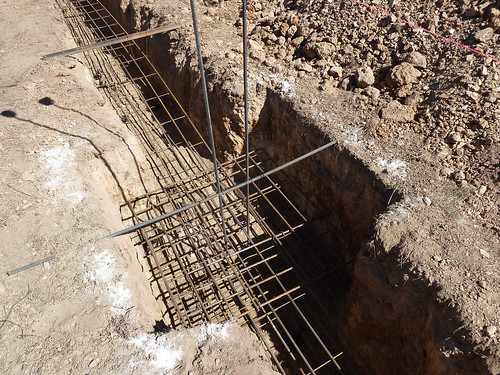
Two layers were needed. The first, 5cm from the bottom of the trench; the second at least 5cm from the top of where the concrete would be poured to. Plus all needed to be at least 5cm from the walls of the trench. The steel came in 6m lengths, by around 30-35cm, so the guys had to cut it to measure using an angle grinder. Where there were joins, the steel had to overlap by 60cm. And of course the columns needed to cover a wider area.

To position the steel, effectively in mid-air, they dangled it from wires tied to rods that were balanced across the top of the trench. In short - it was a really fiddly job, and pretty tedious when you consider they had to do it for 130m of trench!

trench work and laying steel - 18

trench work and laying steel - 19 trench work and laying steel - 15

Finally, the upright steel poles that would go in the middle of the columns needed to be put in and wired into place in the mesh. These were carefully measured to be 5m apart and there were two poles per column, each about 6 foot tall.

trench work and laying steel - 12

Step 1: digging the trenches

Dave is back, and brought the camera with more photos. Looking through them makes it clearer just what an enormous task it was to get the foundations in place.

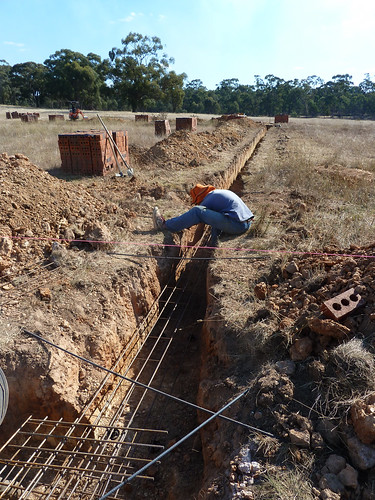
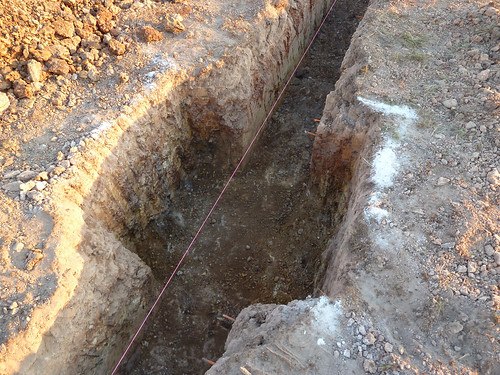
The first step was the get the trenches dug. They needed to be 60cm deep and around 50cm wide, except where the columns were, when they needed to be about 1m wide.

trench work and laying steel - 05

The guys tried to do it first using our tractor, but it was such slow going that they ended up having to hire another tractor - the main difference being that it had a bucket with special teeth.


I fear we are going to need to buy one of these teeth buckets.

Friday, April 15, 2011

The first columns go up...

Despite the disasters, the guys have slogged on and made progress. I'll have some more photos to put up (I hope) once Dave returns with his camera, but in the meantime, here's a sneak preview of what they've achieved thus far from Mum. I really like them :-)

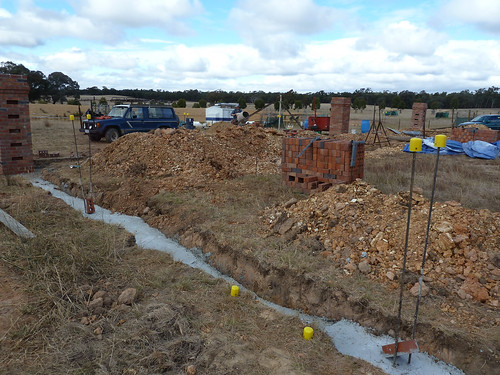
This shows a close-up of the first column Pete built, looking I think along the short end. Even here the concrete trench looks endless... The yellow sticky up bits are steel rods that apparently go in the middle of the columns to provided added support.

working on the garden wall - 07


Here's some more views of columns being built. The gaps are for us to attached whatever it is we end up using to fill between the columns. The inside is solid brick also.

working on the garden wall - 06 working on the garden wall - 04


Here's a view of one of the gatepost columns, with Pete in the background. I really like the little pattern he's done at the top - we took a photo of our chimney here in London and it's modelled on that I think. :-) Ultimately we'll probably put planters on top of each column for succulents - the kind that need little water and will trail branches down, as a sort of living finial - but waiting on that until we get the walls filled in.

working on the garden wall - 03


And finally, here's a view where you can see a couple of the columns done.

working on the garden wall - 08

Tuesday, April 12, 2011

digging out rock to put down fake rock (aka why building regulations suck)

So things haven't gone quite to plan in the work at Amherst on the brick wall. I'd had the notion that it would take only a day's work to finish off the trench digging that was started a couple years back. Then a quick visit from a concrete truck or two and voila - ready to lay bricks.

Unfortunately it turned into an epic saga, and not in a good way.

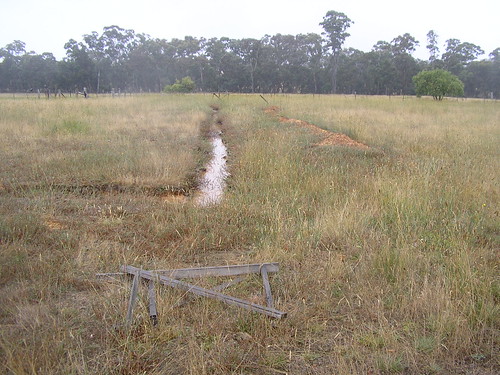
The first bad news was that the old trenches were apparently unusable, as the rainwater they'd caught and held like very long thin dams had apparently worn away the edges and made them too wide. So the guys decided to dig new trenches everywhere.

trench for walled garden foundation

The second bad discovery was that despite having had so much rain recently the ground was as hard as a rock. So hard that digging the trenches was taking forever, and so they had to hire a bigger tractor! (This is after justifying the purchase of our tractor by it saving us from ever having to hire equipment again *sigh* I swear, next time I'm buying a new car and forget the tractor).

Even with the hired tractor and working round the clock under floodlights on shift, it still took them days to get the trenches dug. The ground was so solid and they kept hitting rock.

And then, this is the bit where I think building regulations are UTTERLY MAD... we were only digging out all that rock to replace it with FAKE ROCK aka concrete. Honestly, I don't understand why this was required. Our 2 storey brick house in London has stood with a foundation of about 10cm of rubble on clay soil for over 100 years now with no problems. (I'm serious - we found this out when we dug down to have a look when we put on extension). Yet apparently in the middle of a paddock in rural Australia you can't build a brick wall on rock-solid ground without sinking a deep concrete trench. *sigh*

Oh, and then there's the steel. All this steel mesh and rods and other stuff had to be buried in the concrete. No-one had told me how much steel we'd need - or how pricey it'd be. In the end I reckon the raw materials alone have come in about double the budget, and that's before you factor in the dire exchange rate at the moment.

Still. It had to be built if we wanted to get anywhere near the dream for the garden. I guess I'll just be working in London a while longer than planned to pay for it all. :-(

Thursday, April 07, 2011

da da, the bricks are here

So... it was a saga and a half to get the bricks.  The delivery company never told us it'd come in two separate loads - and then they decided to deliver one of the loads a day early (thankfully a combination of my Mum on the phone, and my brother making a mad dash to get up there early saved the day).  And of course they all got confused about the location, having not paid attention to the instructions we gave when ordering.

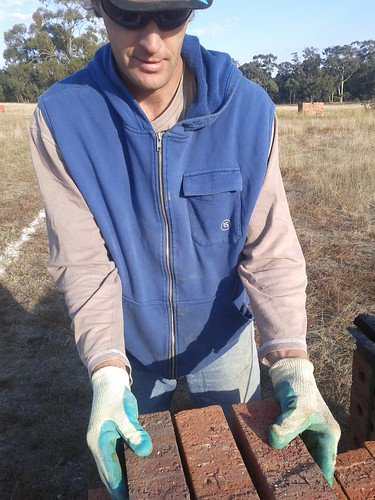
But all is well in the end - they arrived safely and they are lovely.  This is my brother Pete showing a few off.   :-)

pete and bricks

Wednesday, March 23, 2011

choosing bricks for the garden wall columns

We're having a big push on with work in a few weeks when Dave visits.  Dave and Dad are planning to focus on the house framing for the cottage extension.  Pete (my brother, who is a bricklayer by trade) is going to finally make a start on the vegie garden wall, and for that he needs bricks.

As this wall is such an important a part of my dream - basically I want a traditional English old walled garden that looks like it has been there 150 years - choosing the bricks was not straightforward.  Especially since I'd already compromised once.

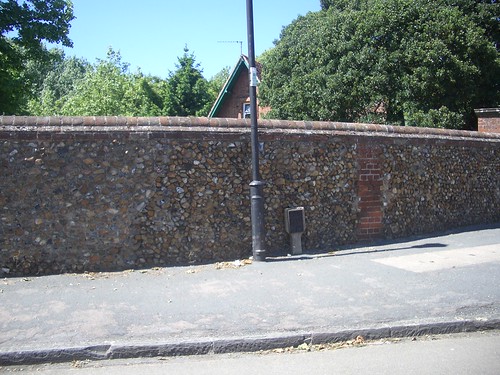
To recap: originally I wanted a solid brick wall, but quickly learned a tall thick wall for a 25m x 40m enclosure was going to break the bank.  So now we are just having brick columns which we can then join up in between.  To begin the fill in will likely be a mix of wire or cheap fencing sheets, then as time permits  we can thicken it up adobe/cob style... perhaps even stick on cobbles and small rocks to finish like on this old wall we spotted in Cambridgeshire:

Stone wall in Cambridge

So, back to the bricks.  Originally the plan had been to use secondhand bricks to build the columns, because they'd be cheaper and also would have the right finish (ie: old and bashed about a bit).  That wasn't viable unfortunately as the only two places we found that could deliver them didn't have any in stock, and Pete wasn't willing to risk ordering sight unseen.  Apparently there is a big variation in quality - some are harder, 'first fired' vs others are more porous and 'underfired' so you have to inspect.

So then we started looking at new bricks.  Mum and Pete went to meet a friendly Ballarat brick supplier and sent me photos of their major lines.  Which was when I nearly gave up on the whole concept in despair.  Some of the bricks were OK colours, but they had nothing like the textured feel of the old English bricks I'd fallen in love with.

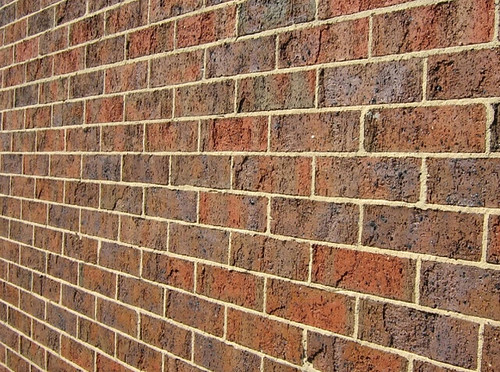
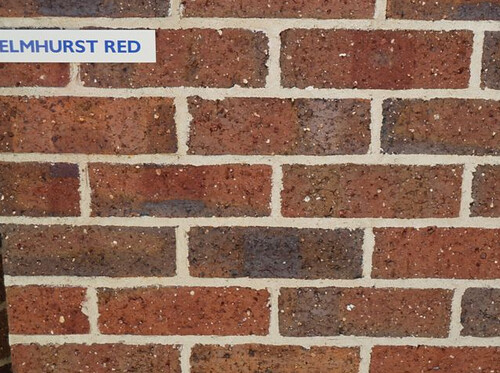
Luckily, Pete came to the rescue with his suggestion of Daniel Robertson bricks.  They're a bit more expensive, but justifiably so given they have a far nicer blend of tones and have captured that 'old' look even though they're new.  Just consider:

Elmhurst Red                                 Daniel Robertson blend 153
Elmhurst Red brick  Daniel Robertson Blend 153 brick

To cut a long story short, we've splurged for the Daniel Robertson blend 153 for all the visible bits of the columns... and saved a little money by getting the Elmhurst Red for the hidden parts.  Now we're reliant on Pete's bricklaying skills to get the right effect - but I have faith.  He's apparently been working on top-end heritage projects in his day job for a couple of years now so he's had lots of practice.  :-)


Sunday, February 13, 2011

Orchard mowing

Dad helps us out a lot, but he can't get up to work there as often as he would like - and when he does go much of his time seems to get used up by maintenance.  So, we decided to find someone local to help us out with the garden work - and were put in touch with Michael who is proving to be a godsend.  Not only did he do a brilliant job mowing the orchard, he sent photos!   :-)

orchard after mowing 2011-02-03_14-23-28_282

orchard after mowing 2011-02-03_14-23-16_572

orchard after mowing 2011-02-03_14-23-02_575


Friday, December 31, 2010

We planted pigs ear

While browsing in Talbot's nursery earlier in the day I'd spotted a lovely succulent bush that was waist high.  The guy told me it would only take a couple of years to reach that height, so thought I'd experiment with putting them in at Amherst.  We bought 8 plants.

orchard - 09  orchard - 14

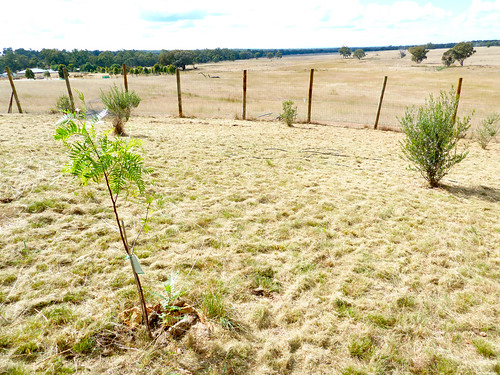
So as to protect from kangaroos and sheep, we put them in the orchard, in a sort of ring near the fence.  Although they won't grow fruit, they'll still look nice and shouldn't be in the way of anything as we can grow climbers behind.

It was a great feeling to actually get something new in the ground there - a very small progress step.  But even more amazing was to see the soil.  I guess thanks to all the rain it was really pliable - no need for tractors in digging, we didn't even need to add extra compost.  It was much better soil than I'd imagined.

To show you what I mean, here's a short clip of Dad digging a hole...


... and here's me putting in one of the 8 plants.

Mowing the orchard

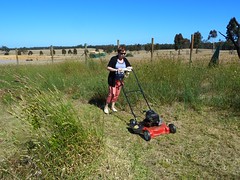
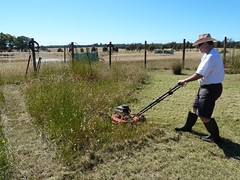
Even though Dave had mown it in August, there had been such a lot of rain that the grass was crazily long again.  So although we hadn't planned to do any work on this visit, Dad and Vida pitched in to get it cut.

orchard - 03  orchard - 10

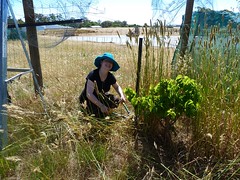
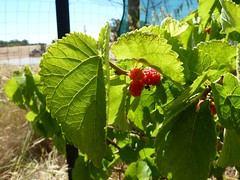
Meanwhile I climbed into the mulberry enclosures and cut back the overgrown grass to reveal some very bushy little trees - complete with mulberries!

garden - 22  garden - 24